部屋に机が欲しいな、と思ってもお洒落な机って結構なお値段がしますよね。
でも、自分で作るなら購入するより断然安いお値段で作れます!
【DIYで作るメリット】
- コスパがいい
- サイズを自分で決めれる
- お洒落
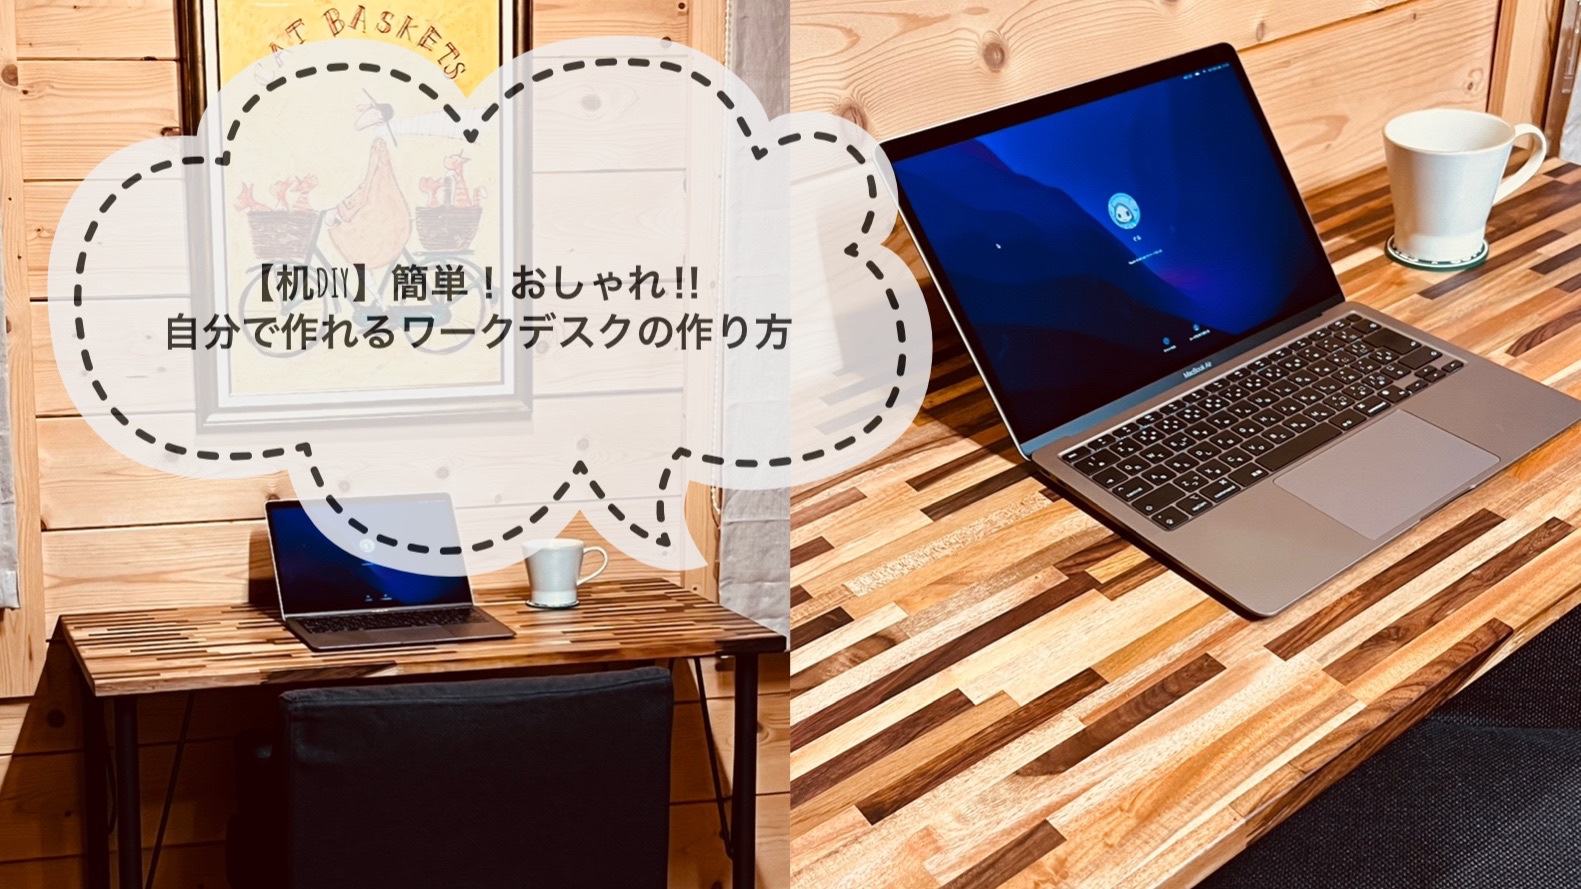
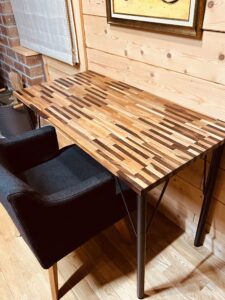
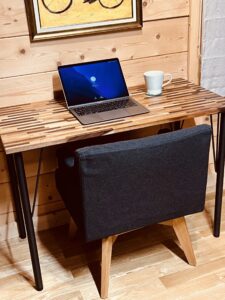
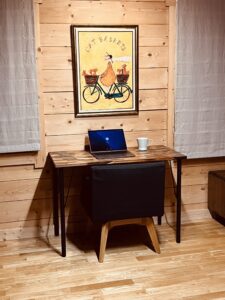
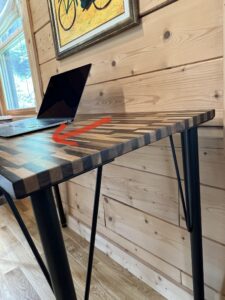
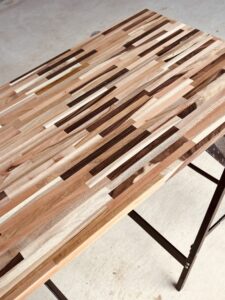
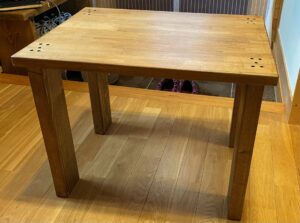
【完成した机】
 ぐら
ぐらこんなに可愛い机が、簡単(2時間程度)に、リーズナブル(1万円程度)で作れちゃいます♪
 べあ
べあ皆さんもお洒落な机を自分で作っちゃいましょー!
- 簡単でお洒落な机の作り方
- 低予算で作れる机の作り方
簡単でお洒落な机を作るポイント
 べあ
べあ簡単に且つお洒落に作るコツはこれです!
天板はカットサービスを利用する
天板はホームセンターで購入すると数十円で1カットしてくれます。
家に電動丸ノコがあると簡単にカット出来ますが、初心者がお手軽にDIYしたいのだったらカットサービスは便利です♪
ネットで購入する時もカットサービス有りのお店も多いので有効活用しましょう。
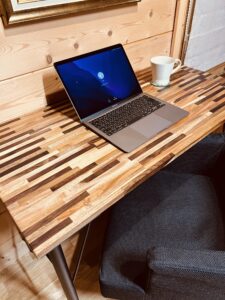
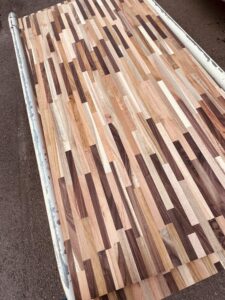
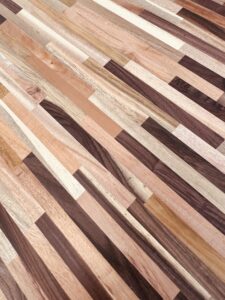
天板は集成材がおススメ
天板は「集成材」がおススメです。
集成材だと反りが起こりにくいので初心者向けです。
さらに無垢の一枚板を買うより断然お得です!
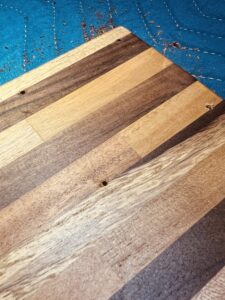
MIX集成材やアカシア集成材などだと色の濃淡を交互に合わせてあるので塗装した際に表情が出てお洒落に仕上がります。

 べあ
べあこちらの集成材はカットサービス有りです。
板自体に表情があるので、塗装するだけでお洒落になってくれるのでおススメです。
塗装は「ブライワックス」で行う
簡単に作りたいなら塗装は「ブライワックス」がおススメです。
ブライワックスは
- ハケでは無く、布でこするように塗る
- 乾燥までの時間が早い(約15分)
という特性があるので、通常の塗装より簡単です。
【ブライワックスって何?】
蜜蝋とカルナウバロウが主成分のナチュラル塗料。
筆やハケを使わず布で塗りこむだけのお手軽さがと木目を消さないナチュラルな仕上がりがウリ!
ブライワックスを使うことで木材の表面の保護、ツヤ出し、着色が出来る便利な仕上げ材です。
ただし、水分に弱いので屋外の使用や濡れやすい場所での使用には注意にしましょう。

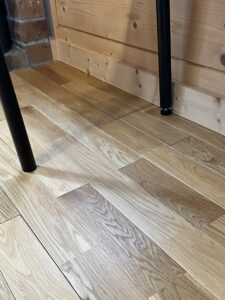
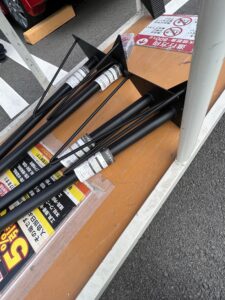
脚はアイアン脚を使う
脚は「アイアン脚」がおススメです。
机の脚を木で作るのもお洒落ですが、一気に手間が増えます。
アイアン脚を使えば1枚の天板にアイアン脚をビスでセットするだけなのでとってもお手軽です。
しかも、アイアン脚の机も木の脚で出来た机に負けず劣らずお洒落です。
ぐら今回わが家ではこのアイアンの脚を使いました。
この他にもアイアンの脚は色々なデザインのものがあるので好みのものを探してみましょう!

机の最適なサイズ
会社などで使われている事務用机のサイズはJIS規格で決められています。
- 幅:106㎝
- 奥行:73㎝
- 高さ:74㎝
これを基準に自分の机の設置場所の大きさによって変えましょう。
 ぐら
ぐら好きなサイズを1cm単位で決めれるのもDIYのメリットですね!
我が家はリビングの一角に机を設置し、机の上に置くのは主にノートPCの予定だったので、事務用机サイズより小さめにしました。
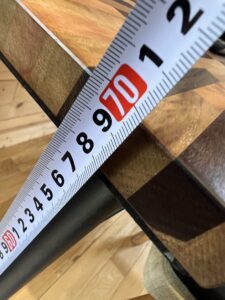
天板のサイズは「幅100㎝、奥行き50㎝、厚さ2㎝」で、高さは69~70㎝です。(アイアン脚の高さ67㎝+天板の厚み2㎝)
デスクトップのPCを設置する、モニターを複数台設置したい、作業台として使いたい等、用途や設置場所に合わせて天板の大きさは変更してください。
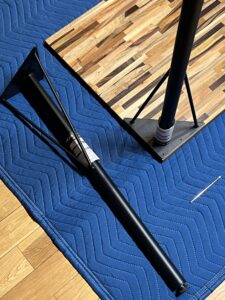
私はこの机では主にPC作業をするので机の高さにひと工夫しました。
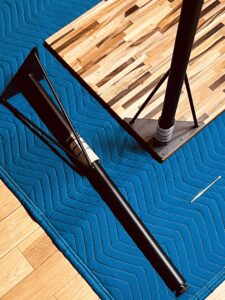
机を平坦にするのではなく、奥を高めに、手前を低くして緩やかな傾斜を付けます。
長時間のタイピングでの際、少しでも手首の負担を軽くするためです。
方法は簡単。
奥のアイアン脚のアジャスターを高くして、手前のアジャスターは外します。
そうすると奥の高さは72㎝、手前は70㎝で2㎝分の傾斜が付きました。
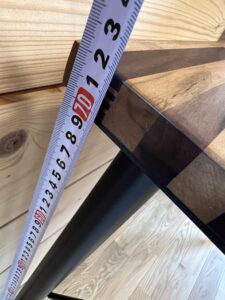
微細な傾斜ですが、長時間の作業だとこの傾斜がいい仕事をしてくれます。
ぐらアジャスターは簡単に付け外しが出来るので、PCデスクとして使う方は試してみて下さい。
机をDIYするのに必要な道具
ドライバー
アイアン脚をビス止めするのにドライバーは必須です。
電動ドライバーとドリルビットがあると更に便利!
※下穴を開けられるので綺麗にビス止めが出来る為
ぐらお手頃なお値段で電動ドライバーセットがあるので、これを機に用意するのも良いですね。

 べあ
べあ本格的にDIYを始めるなら私と同じマキタのインパクトドライバーセットがおススメです。
 ぐら
ぐらインパクトドライバーは音が大きすぎて…という方はドライバードリルがおススメです!

【インパクトドライバーとドライバードリルの違い】
インパクトドライバーはパワーがあります。
- 硬い場所への作業にはこちらの方が便利。
- 難点は音が大きいこととパワーがある分取り扱いが難しいことです。
ドライバードリルは繊細な場所への作業に向いています。
- 音も静かで軽めなので女性や初心者向きです。
- 難点はパワーがインパクトドライバーより小さいので作業箇所が硬いと作業効率が悪くなることも。
べあ我が家ではログ壁にビス留めすることも多いのでインパクトドライバーを選びました。
サンダー
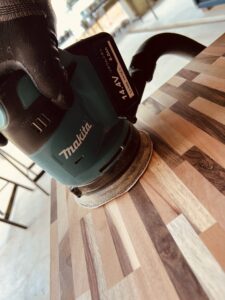
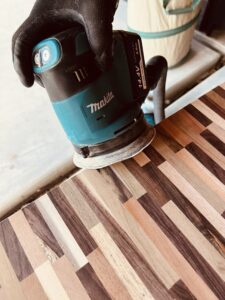
塗装前に表面をやすり掛けしますが、広い面を削る場合、サンダーを使った方が効率的です。
サンダーにサンドペーパーをセットして使います。

手動のサンダーより電動のサンダーの方がより効率的です。
べあDIYをがんがんやっていきたいなら電動サンダーがあると便利ですよ!
 ぐら
ぐらDIY初心者にはお手頃価格のミニサンダーもおススメです。

電動ドライバーや電動サンダーはあると楽に作業が進められるので使うことを推奨します。
DIYを今後もやるのだったら購入するのがおススメですが、今後もDIYをやるかはっきりしない人や、使い心地を確かめたい人はホームセンターなどで行っている「工具レンタル」を利用してみるのもいいと思います。
カインズホームなどはレンタルの他に「カインズ工房」というレンタル作業場があります。(※1)
作業する場所もない場合は利用するのもおススメです。(加工材料持込の場合、有料ですがカインズで加工材料を購入した場合は2時間無料になります。)
(※1)店舗によっては設置されていない場合があるので、最寄りのカインズに事前に確認を取ってください。
材料
天板
天板は机の顔なので、自分の好みの板を選びましょう。
反りが出にくく値段もお手頃な集成材がおススメです。
今回我が家ではミックス集成材を選びました。
アカシア集成材もおススメの板です♪
 ぐら
ぐらこのアカシア集成材はカット無料なので好きなサイズに出来ます。
アイアン脚
奥行の長さに関係なく設置出来るので4本バラバラのタイプを選びました。
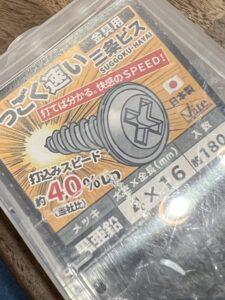
ビス
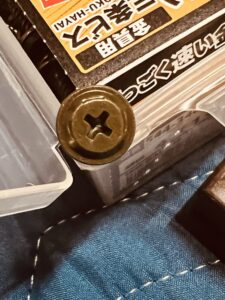
天板にアイアン脚を付けるためのビスです。
ビスを購入するときには長さに気を付けましょう。
べあ我が家の天板は厚さ20㎜天板なのではみ出ないように16㎜のビスにしました。

サンドペーパー

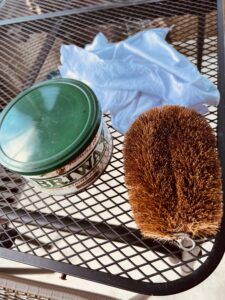
ブライワックス、ウェス、たわし
天板はブライワックスで塗装します。
ブライワックスは木目を生かしたアンティークな仕上がりになるのでおススメです。
- ウェス→ブライワックスを塗装するのに必要
- たわし→塗装の仕上げに必要
 べあ
べあ我が家で作った100×50×70㎝(厚さ2㎝)の机に掛かった材料費はおよそ1万円でした。
作り方
作り方はとっても簡単な3ステップです!
【やすり掛けの効果】
- 肌触りが良くなる
- 塗料ののりが良くなる
やすり掛けを怠るとトゲが出てたりささくれに引っかかってしまったりする可能性があるので、面倒でもやっておきましょう。
【やすり掛け手順】
- #120で全体やすり掛け
- #240で全体をやすり掛け
- ウェスで木粉を拭きあげる
※集成材は表面が比較的整っているので#120→#240の2段階でOK
表面をつるつるにし過ぎると塗料のノリが悪くなってしまうので注意!
【塗装の効果】
- 木材の表面の保護
- ツヤ出し
- 着色
集成材は一見綺麗で塗装の必要がなさそうですが、表面の保護が無いと汚れが付きやすかったり乾燥が進むのが早かったりするので綺麗な状態で長持ちさせたいなら必須です。
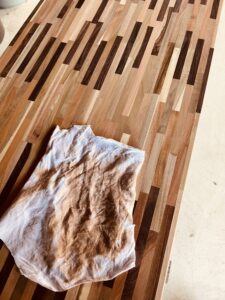
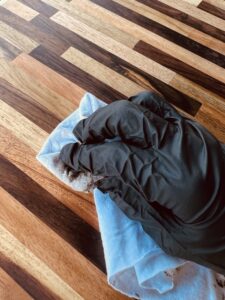
【塗装の手順】
- ウェスでワックスをしっかり塗りこむ
- 乾燥後(15分程度で乾燥する)たわしで磨く
べあしっかり磨くと艶々になります♪
【脚のビス止め手順】
- 脚をつける位置を決めて下穴をあける
- ビス止めする
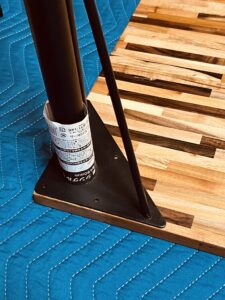
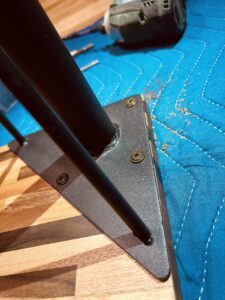
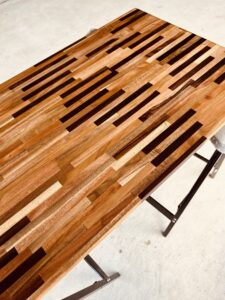
4本のアイアン脚をビス留めしたら完成!
べあ大満足!
 ぐら
ぐら可愛い♡
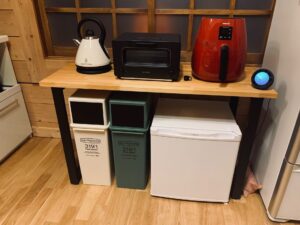
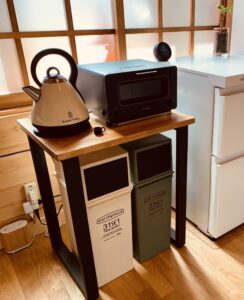
【番外編】
全く同じ作り方でキッチンの机も作っています。
天板の種類とアイアン脚の形が違うとまた違った雰囲気です。
 べあ
べあこれもイイ!
終わりに
突然思い立って作ることになったワークデスクですが思った以上に簡単でリーズナブルでオシャレなものが出来上がりました。
皆さんも好みの板とアイアン脚で自分だけのお気に入りの机を作ってみてください♪
べあ楽しいDIYの世界にようこそ!
関連記事ご紹介
こちらは脚も木で作ったちょっと上級編のプリンター台の作り方です。
ぐら是非こちらも見てください♪
最後までご覧いただきありがとうございます。
ランキングに参加しています!
べあぐらのイラストをポチッと押して頂けたら嬉しいです♪